Quick Links
InMetaphor, ReFantazio, the Giant Sandworm’s Belly is a unique, one-time dungeon that will disappear after it is cleared once. After trying and failing to take the Giantworm Homo Butera, the hero’s party will find themselves in the belly of the beast, quite literally. And the only way out is through.
Giant Sandworm’s Belly has its own set of rules, which are quite unlike anything players will have encountered beforehand. The main reason is that every second spent inside the belly is a race against the timer, a mad scramble to the finish line. This guide covers how to manage the timer correctly and pick up all available treasures for a 100% clear.

Giant Sandworm’s Belly Dungeon Preparation
Before entering the dungeon, pick up theHero Incensenear the Mysterious Old Man and make a hard save by talking to More’s cat. Then, attack the Lump of Flesh to enter the first section of the Belly.
As soon as you enter, you’ll see a timer in the top middle of the screen counting down from 15 minutes. When this timer runs out, the digestive fluids will flood the Sandworm’s Belly, and you’ll be immediately killed. The goal of this mission is to exit the dungeon before that happens. Additionally,the timer does not pause during battles, meaning engaging in battles with the many enemies roaming the stomach is a bad idea. Aim to avoid all battles with the goo-like monsters in the area, as they are only going to waste your time.

Opening the map pauses the timer in the Giant Sandworm’s Belly. Use this feature to plan out where you need to go.
However, there are a ton of treasures scattered throughout the Giant Sandworm’s Belly, and since this is a one-time dungeon, picking them up now is the only way to obtain them.

Giant Sandworm’s Belly First Section (Foregut)
Turn left as soon as you enter. Clear the path using auto-attacks and open the chest to claim theBalm of Life.Turn around and then left, and you’ll see two forking paths.
Take the path on the left first, and you’ll see multiple goo-like red, green, and purple monsters guarding the area. All of these enemies are immune to physical attacks and take too much time to defeat. Avoid them as they come and run through the path, picking up the blue items along the way. At the end, turn right and clear the brambles to claim the treasure chest containing theHero’s Leaf of Light (increases Archetype Experience by 1000).

Don’t attack the Lump of Flesh yet. Turn around, and you’ll see two paths again. Take the one that’s overflowing with black stomach acid on the surface. Pick up all the blue items one by one until you clear out the area. Spam the dodge button to move quickly through the stomach acid. It will periodically damage the party, but it’s not life-threatening and can be healed later on.
After everything there is picked up, you’ll find yourself back at the start. Turn right, and you’ll see aRed Elmentaon the path ahead. This Elmenta is alone, easy to take down if you stun it first, and worth defeating for the MAG and Reeve rewards. Do so, and continue onward along the path. There will be plant-like monsters on either side of this path, spewing green goo out of their mouths periodically. These are not real monsters but obstacles. Dodge their attacks as they come, and you’ll be able to reach the other side.

Avoid the monsters guarding the Lump of Flesh and attack it to open the path ahead.
If you die at any point in this dungeon or the timer runs out, you will return to the very start. Auto-save is disabled.

Giant Sandworm’s Belly Second Section (Hindgut)
There will be four possible progression routes at the start of this section. Leave the leftmost one for last; it has an unavoidable boss fight. Take the rightmost path first and clear the brambles to pick up the two blue items here. Return to the start and delve down into the stomach acid, picking up the blue items along the way. Once you’re free of the acid, turn right, and you’ll see a thin path lined by more of the goo-plant obstacles. Take this path to find another treasure chest containingFencer’s Headgear.
Do not engage the Red Elmenta in this section. It is surrounded by strong enemies and will not be as easy to take down as the last one.
Circle around and enter the second stomach acid area to pick up all the blue items on the ground. By now, all parts of this map other than the leftmost path should’ve been revealed. Open the map to see if there are any blue items you missed. If not, return to the start and take the leftmost path to fight the Homo Fios.
How to Beat Homo Fios
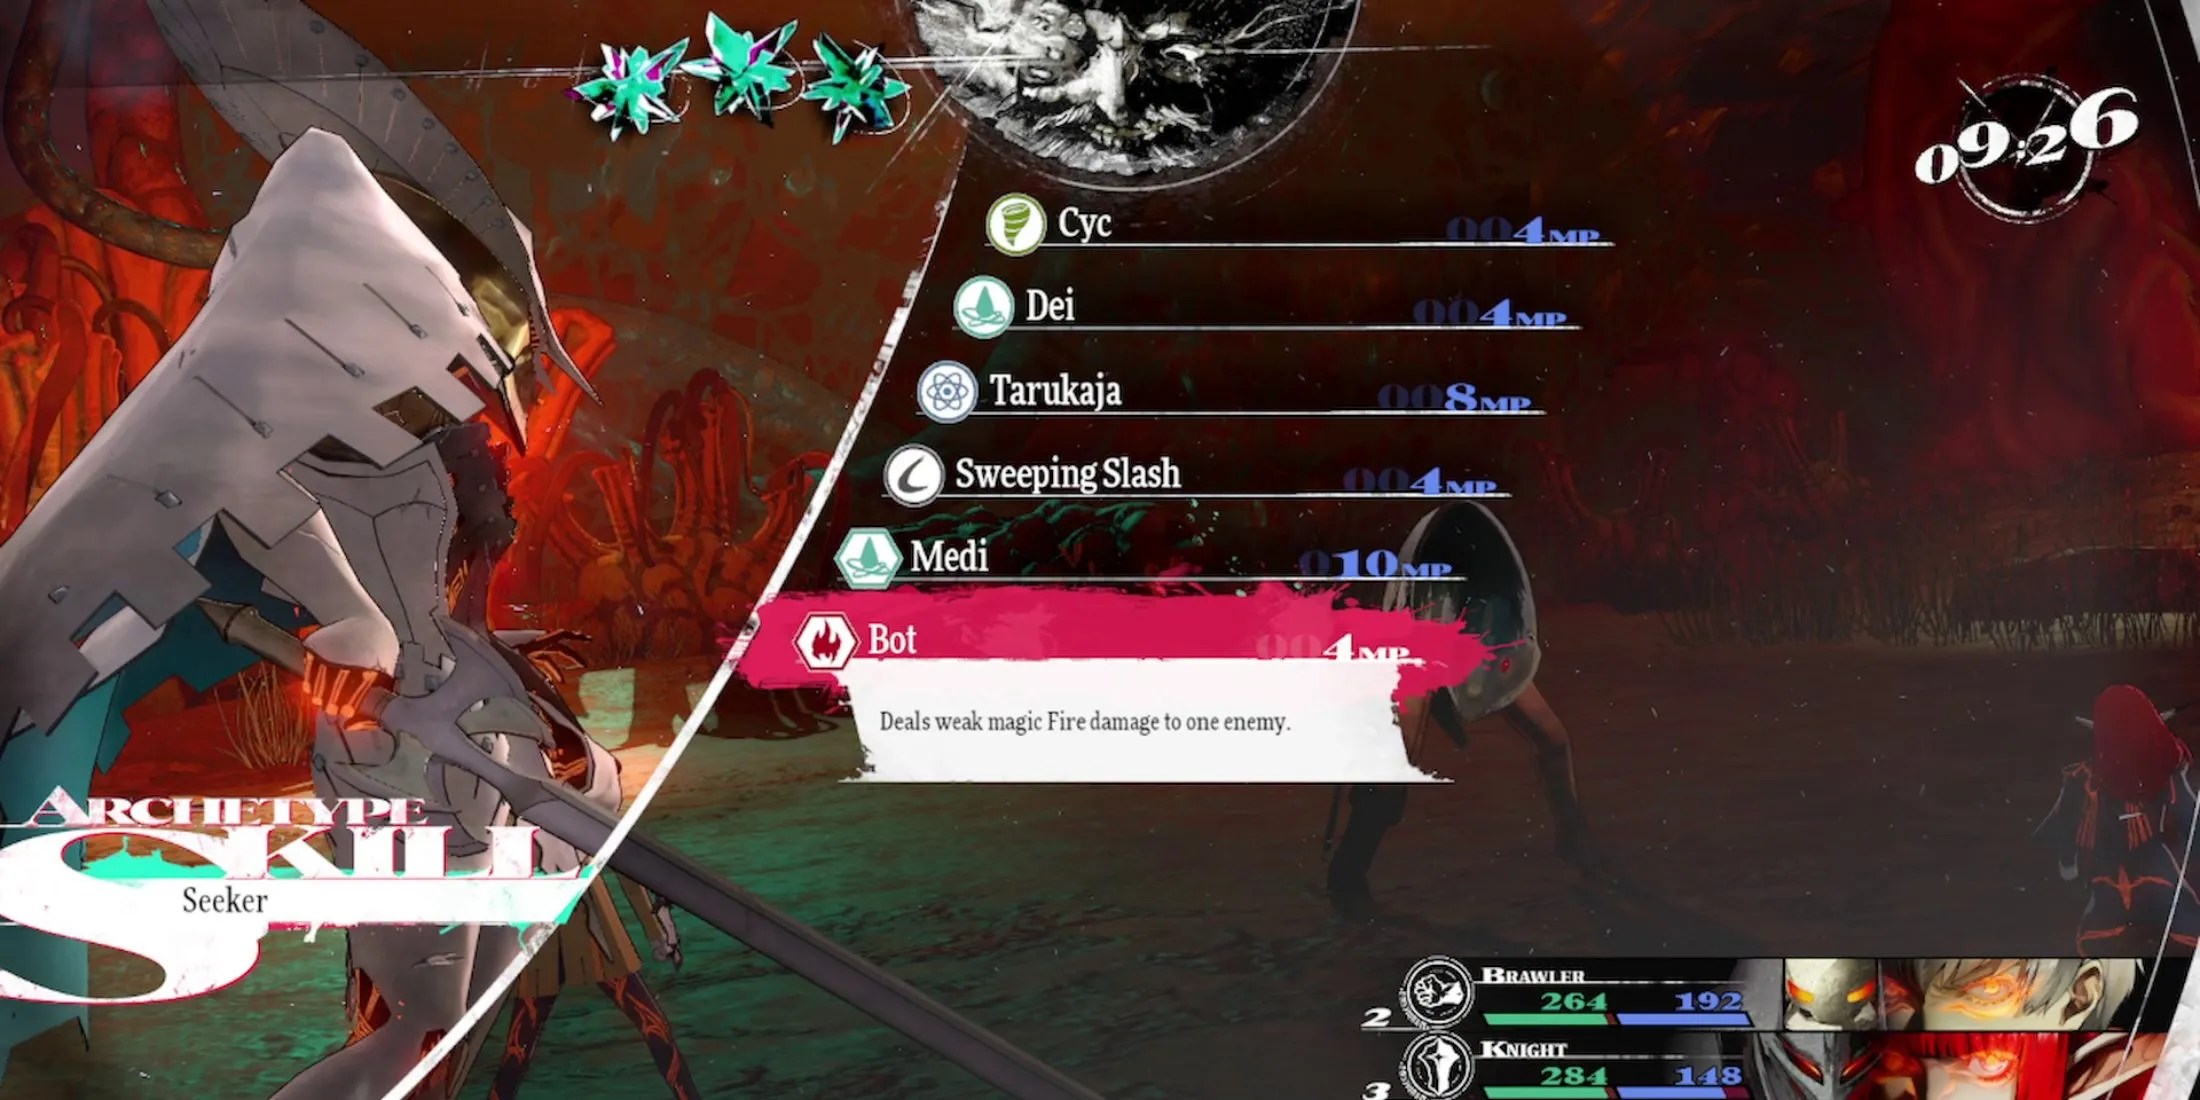
Homo Fios is weak to Fire damage, which makes Mage the best class to use against him. An easy way to breeze through the fight is to switch the Archetypes of the entire party to Mage, resulting in the party composition of Mage, Mage, Mage. Since Mages get access to Bot (fire-type skill) at the very first level, this means you will have access to Homo Fios’s weakness across the board and will be able to get 6 attacks off in a single turn.
The only problem with this strategy is that Homo Fios is faster than the entire party and goes before the battle begins. Its signature skill,Fishy Fandango, drastically increases its evasion and Hit rate, which makes missing attacks and losing turn icons very likely. And if an attack misses, two turn icons are lost, and the Homo Fios can turn the tables easily.

The solution to this is to liberally use the’Retry Battle’function and reset the fight to the start every time this happens. Just spam Bot until it sticks, and Homo Fios will go down in one turn. Since the timer also resets when the battle resets, there are no downsides to this strategy in the Giant Sandworm’s Belly dungeon.
After defeating Homo Fios, open the treasure chest on the right to get theScorpion Sting (Gunner weapon). Attack the Lump of Flesh to open the path ahead. Then, avoid the monsters guiding the final Lump of Flesh and attack it to reach the final chamber.

How to Beat Parasitic Valmo
The Parasitic Valmo’s first move will be to summon two Vampiric Gelatinos to aid it in battle. It can only summon these monsters once, which means taking them out first will make the fight significantly easier. TheVampiric Gelatinos are weak to Ice and Lightning and immune to Physical and Fire damage.If Ice-type attacks aren’t available, use Wind or Lightning-type elemental damage, and avoid using melee attacks on them; they will immediately counterattack. After the Vampiric Gelatinos are dealt with, focus on the Parasitic Valmo.
Parasitic Valmo is weak to Lightning damage and immune to Ice. The easiest way to deal Lightning damage is through the Mage’s skill, Kande, which can be learned at Rank 6 of the archetype. Alternatively, players can also use consumable items that deal fixed Lightning damage to target Parasitic Valmo’s weak point or rely on physical attacks to dish out damage.

The Parasitic Valmo can be afflicted with the Forget status before being able to summon the two Vampiric Gelatinos, which will make this fight incredibly easy. However, this strategy only works reliably forcharacters with high Luck.
